Tuesday, 14 May 2019

Major Project - Reflective Statement

Google Image
Challenges
Once my character was fully modelled and textured, I felt completely daunted about the rigging and skinning process which was the next stage. The thought of it caused me to panic, although, I wasn’t able to explain why I felt this way.

It took a lot of time and perseverance to rigg just one side of my character. I seemed to have lots of minor problems that occurred, I found this frustrating as it further increased my  anxiety during the process.

I had hoped that rigging the other sides might however be easier because I had already done it once.  This was not the case as similar problems occurred and I did not find it easy to recall the process easily. 

The patience and understanding demonstrated by Alan during this time helped me to grow in confidence – such support was instrumental in enabling me to complete my degree.  By the 3rd or 4th time of rigging and skinning my character, the process started to sink in and tasks were completed much more quickly and efficiently.

Learning outcome:  Understanding that some of the difficulties I experienced were due to my dyslexia was actually reassuring. Alan helped me to identify my best learning style and was able to teach me in a way that I could understand. On reflection – this is actually life changing for me as I now feel comfortable saying to people – ‘you need to explain things to me in this way’.

By now I was beginning to feel quite excited and keen to move onto the next stage, even though I knew that the animating stage was not something that came naturally to me.   Initially my scenes looked mechanical and clunky.  Although I did seek support, having also discovered my best way of learning I watched a lot of reference material.  This underpinned my learning and enabled me to seek out the support of Alan, slightly less! I really enjoyed seeing my character come to life and this process actually began to fill me with pride.

Learning outcome: 
Knowing where I can get help is important to me but being able to resolve issues myself gives me  greater confidence in my abilities and  is liberating and fulfilling.

I can see now aspects of my character movement which could still be improved and with more time I could have achieved this.  Previously however, I wouldn’t look for improvements that could/might be made as my focus would be task orientated.

Throughout the project I have been dealing with some complicated  health issues which have been  a struggle but I believe this project has been a form of escapism for me. It has been distracting and enabled me an opportunity express myself in ways I had never imagined.

I experienced  difficulty in being able to animate my character in the front view.  This placed limitations on my character  and meant that I had to change and manipulate a lot of my scenes so that they worked with the way in which my character could move.

Learning outcome:
At the commencement of this course, I did not adapt well to change.  I would take constructive criticism personally – or when modifications were suggested I would feel as though my own ideas and interpretations were not good enough. I have learnt that support, help and advise comes in many forms and that it is not personal but part of my learning journey.

Strengths/Positives:
My organization skills of setting myself tasks, deadlines and targets have helped me to keep moving in a time and pace right for me. I like to refer to the story of the 'tortoise and the hare'. My classmates were often the hares which speedily got things done in short periods of time. Their speed discouraged me at times and made me panic. I realize that I was the tortoise all along that went slow and steady to finish the race. I got there in the end like everyone else! I now see this characteristic of mine as a strength.

I struggle a lot with my learning difficulty, which I'm not always open about. I am proud of my determination, motivation and learning strategies  which have carried me through this project.  In some ways,  I wish I was more open from the start of this course about the difficulties I faced. I've learned so much more about my 'different ability' and am thankful that my tutors recognised this and facilitated a way in which I could accept and understand it – almost without me even knowing.

This project helped me think 'outside the box' more and freed my imagination.  I like rules and boundaries and sometimes when they are stripped away I feel exposed and worried that I am not sticking to the rules. I feel safe with my thoughts ‘inside the box’ – where I am less likely to make a mistake. However – I have learned to embrace the freedom and understand that mistakes don’t really exist in this area of Art, instead they are just things to learn from.


I managed to break free from the chronological order of my lists and jumped around different tasks. My lists were actually completed more easily in this way and helped my see the project as a whole, rather than as a set of many tasks.

I enjoyed coming into Uni and valued the help and friendship available from my peers/tutors. I loved the sense of community we created. This was good for my own emotional well being and ultimately improved my work and confidence in my own ability. I felt part of a group, that wanted to see me do well.


Overall
Now that my project is complete -  I actually feel a sense of loss!  I have lived and breathed my Mountain King for nearly two years, getting to know this quirky gentleman who somehow became an extension of myself. 

As my project has progressed, I realise that the target audience for my animation is school children – learning about ways in which music can speak into our emotions, thoughts and feelings.   This was not my original aim but I believe that the UPA style and 2D animation set to classical music has educational benefits and qualities.  Perhaps even, there is a gap in the music education resource packs!

Looking back on my entire degree course.  I am amazed at my achievements and although I have probably learnt more about me than any other time in my life I am fascinated by the fact that it is ‘art’ that has enabled this.

Sunday, 12 May 2019

Tuesday, 30 April 2019

Font Page and Influence for 'Making of' Document'

The Call - Font 

Font - Influence Map

Title Pages for my 'Making of' Document (so far)

Character Design - Title Page

Environment - Title Page

Influence Map - Title Page

Original Thumbnails - Title Page

Shapes - Title Page

Storyboard - Title Page

Saturday, 27 April 2019

The Call - Demo Reel (Draft 1)

I have completed my demo reel for my Animation. This includes: design, modelling, rigging and animation. Any advice on if/how it can be improved is very welcomed!

Rendered Image of The Mountain King


Wednesday, 24 April 2019

Intro Scene - Revisited

Rendered still

I have come back and re-animated this scene. Since adding a lattice deformer to the shape he's sitting on, it forms a bend rather than it moving on just a pivot. See render below:


Sunday, 21 April 2019

Selected objects and shapes to be used in my Demo Reel

I want to use objects and shapes that display interesting movement and unique personality. Here are renders of these assets:

Coat hook, chandelier and drawer - rendered image 

Shapes - rendered image

Wednesday, 17 April 2019

Demo Reel - Preparation and Playblast

Having spoken with Alan, I understand more clearly as to how I should showcase my Demo Reel.

At the beginning it will show all the sides to my model at once, all fully textured. As the characters move on the screen, a linear wipe will form across half the reel showing some of the wire frame to my models. The next part will show an exert from my animation, demonstrating the characters movement.

After this, certain objects/shapes in my animation will be displayed in the same way as my character. Starting with movement, then an exert and then maybe even another set of objects/shapes. Depending on how it all flows and looks.

When I lay it out like this, it helps me visualize it better:

Demo Reel Plan


Monday, 15 April 2019

Shot 20 - How do you render when you using lattice deformers?

I have re - done setting up this scene so that the shapes can bend and swing properly. I have added lattice deformers to a few shapes but I don't know how to render them without them looking jagged?

Lattice Deformers

Rendered Image


Preparing for Character Demo Reel

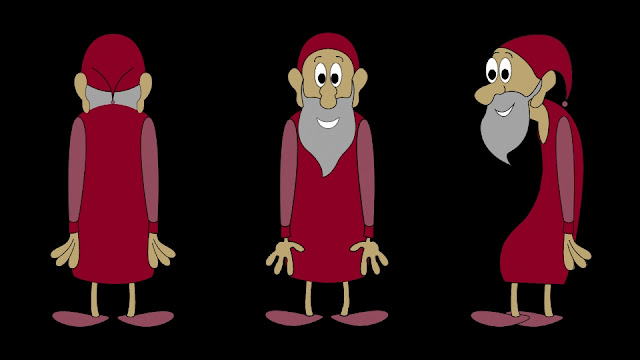
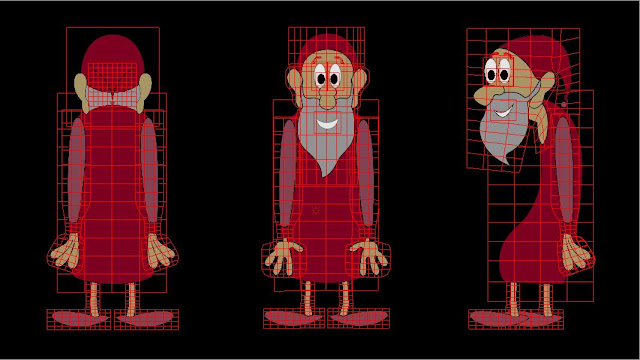
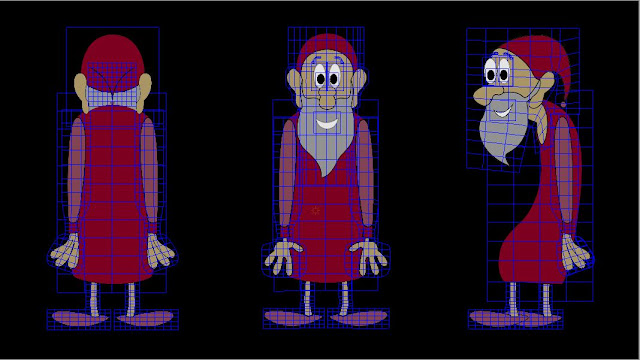
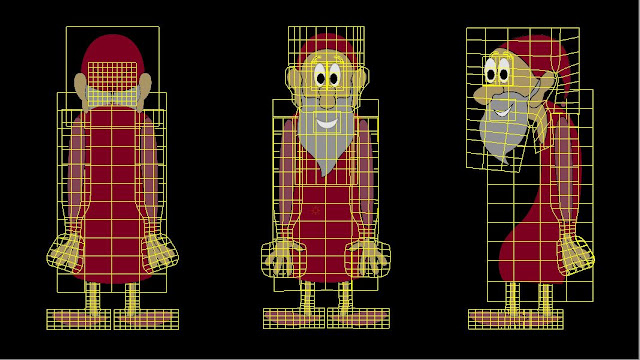
Here is one normal render of my characters, the other images are wire frame on shaded textures. I'm struggling to find a color that stands out enough on the screen for the wire frame.

Normal render

Wire frame on shaded - RED

Wire frame on shaded - BLUE

Wire frame on shaded - YELLOW

Saturday, 13 April 2019

Shot 17 - Progress So far

I changed this scene slightly so that the shapes could bend and bat the mountain king to each other. I'm not sure if the movement looks right yet? I wanted him to bounce from one to the other.

Screenshot from scene

 
Flying from shape to shape - Playblast 01 from Jennifer Ball on Vimeo.

Redesigning the Ending Credits

I wanted to change the colors of the ending credits because the range of colours specifically in the clouds didn't match the rest of my animation.

I want the ending credits to be clear and simple but reflect a bit of the animation's personality. Here are some stills take from the credits in chronological order:

Ending - Image 01

Ending - Image 02

Ending - Image 03

Ending - Image 04

Ending - Image 05

Ending - Image 06

Friday, 12 April 2019

Rendered image of all sides - Preparing for Demo Reel

I have rendered all the sides to my Mountain King model. They will be displayed like this within my demo reel. I need to work out how big I want to scale of the sides of my model,so I can add some text with brief explanations. As well as rendered Images, I want to show the wire frames to my models and show a small clip of each side animated too.

I am planning on adding a few key props/shapes to my demo reel, displaying how they move and work. Then showing an exert from my animation: 'The Call'. I want to be able to show my work in a carefully, clear and organised way.

I think in my case it is important to show in this demo reel the different software's I used. This is so the audience are informed that my 2D character was actually made in a 3D space such as Maya and not just After effects!

All sides rendered together - rendered image

Side view - rendered image

Front view - rendered image

Back view - rendered image


Monday, 8 April 2019

Nuke Lesson 04 - Visual Presentation

I did struggle in this lesson to keep up with the instructions but I eventually caught up an understood where to place the nodes to create the effect I wanted.

Using the transform and invert nodes we were able to slide the doors open, showing the matte painting behind. We adjusted the colour saturation in the alpha channels so that the doors layer matched the matte painting behind. 

The next stage is to add the 'green screen' video behind the opening doors. Once this is done, it will look like the man is stepping through the sliding doors.


Friday, 5 April 2019

How I work out the exact frames to the music

Just thought it would be good to show the process and methods that I use so that my movements are in time with the music:

Wednesday, 3 April 2019

Re - thinking the ending credits

I have gone back to the ending credits and have changed my mind.  My animation is based on the story of Peer Gynt, which is set in the Norwegian Mountains. I looked back at my old concept art of the mountains, trees and clouds and feel it would be a shame to not use it. So I have made it part of the ending credits. I still need to add who the music was by and who made the animation!

Original Concept Art


Parachute Scene - More Progress

I've added some eye movement to each King and other extra movements too, such as arm/leg swings and head turns. Here is my Playblast:


Tuesday, 2 April 2019

Parachute Scene - Progress

I have almost finished animating the parachute scene. I still want to add eye movement to each king and perhaps different mouth expressions too.

Rendered Image 


Monday, 1 April 2019

New Parachute Idea - Rendered Image

Rendered Image from Maya 
My Original Idea was to have just one mountain king fling down at the end, however I think it would be more fun to have 8 of them! All doing individual movements.

Playblasts of Shots 6, 7 and 8 from Scene 3 (with audio)

I have animated playblasts for scene 3. I have come across a problem though, in shot 7 his mouth keeps moving away from his body? Not sure how to resolve this?

Since talking with Alan a while back, he gave me advice on how to improve my scenes. For example in shot 6, rather than have him falling onto the 'pebble shapes', the camera zooms to the left to find him.

In shot 8 Alan suggested that I wouldn't the shapes to form a smiley face. So Instead, I've have made the shapes flip the mountain king vertically. This makes the king fall into the next shot with the sea of shapes. Any more advice on how to improve these shots is always appreciated.

Scene 3 - Playblasts from Jennifer Ball on Vimeo.

Friday, 29 March 2019

The Making of the Call - Front Page Idea

I wanted the front page to reflect the style of my animation. I think it works well at showing a glimpse of the Mountain Kings world. However, It may be a bit too busy and confusing to look at?


Wednesday, 27 March 2019

Nuke Lesson 02 - Visual Presentation (snapshots)

I've really enjoyed learning about this new software. I am keeping snap shots from the lessons to help me remember what I've learnt.

Friday, 22 March 2019

Creating a Lattice for the 'Swinging Shape'

I have re - done the 'swinging shape' so that it moves more like a rope that swings from side to side. I adjusted the geometry, texture and created a lattice. This should help it look less mechanical.


Step 1 - Lattice options, tick use local mode

Step 2 - forms a lattice

Step 3 - snap joints 

Step 4 - Center the joints

Step 5 - Bind lattice to joints

Step 6 - check binding

Step 7 - test the shape