Action: 'Boiling Up'
This is not finished yet but his expression has improved dramatically. With help from Alan we shifted his weight on each frame, moved more body parts and added facial expression.
However, I need to create in between frames to make the movement less mechanical. Moom does have a very large head, so this is something I need to consider next time. I'll make sure that his hand doesn't go through his head.
Animation_02_Boiling_Up from Jennifer Ball on Vimeo.
Wednesday, 30 January 2019
Friday, 25 January 2019
Adjusting the Back View of The King
Wednesday, 23 January 2019
Animation - Moom Boiling Up
Here is my progress. I struggled with the facial movement but I think the movement is almost there.
Moom_Boiling_Up_for_blog from Jennifer Ball on Vimeo.
Moom_Boiling_Up_for_blog from Jennifer Ball on Vimeo.
Saturday, 19 January 2019
Friday, 18 January 2019
Things to think about in my Major Project when looking at my Animatic
 |
| Still from Animatic - Shark Scene |
What different angles does the character position himself in?
- At the start he is laying down in his bed - how would I create this angle?
- Front View
- Left Side View
- The king ends up laying down over one of the stepping stone shapes from the left side view
- Right side view
- One of the mountain king's becomes much larger in the cloning scene
- The scene where he is surrounded by shapes, the camera is looking at the character from a birds eye view. Will I need a top view rigg of my character?
- Back view of him hung over a swirly shape
- The king is sometimes sitting down on shapes
How will I animate certain shapes/scenes?
- At the start the Mountain King is asleep and I want to create a snoring sign for this to make it look like the old UPA Style. Would I just create planes for the 'Z' shapes or just add it in after I've rendered the scene, by using after effects?
- Could the stepping stone shapes wobble underneath him?
- Would the wave shapes in the shark scene be able to move a bit like waves but in a cartoon style?
- Would it be possible to make the 'S' shapes ping like a harp strings?
- How would I animate the part where there are multiple Mountain kings sitting on the horn shapes? Would the Maya file manage that many Mountain kings?
- Could I make the horn shapes ripple as if sound is coming out of them?
- In the second shark scene the lights flash (like lightening) how would I recreate this?
- How can I get the swirly shapes to constantly rotate smoothly without key framing frames unnecessarily?
- One of my shapes expand
- Also I have mountain king heads spinning within the swirly shapes, what is the best way to do that?
- Is there a way I could get the parachute shape to look like its going against the wind?
Thursday, 17 January 2019
Right Side View - Part 6: Skeleton
Having completed the left side view of my character I am now trying to complete the other sides as quickly as I can. This will enable me more time for animating and rendering. I have re-created the joints for the right side of my model. I have given all the joints names and hopefully placed them correctly. I think I am ready to move onto skinning now.
I am hoping to of retained most my knowledge from the rigging and skinning of the left side model. This might make the process a little easier and faster for me when completing the other sides.
I am hoping to of retained most my knowledge from the rigging and skinning of the left side model. This might make the process a little easier and faster for me when completing the other sides.
 |
| Skeleton in Perspective View |
 |
| Skeleton in Front View |
Friday, 11 January 2019
Reflective Statement
 |
This is the area of greatest challenge for me. I prefer to work in 2D as opposed to 3D, however still using the software Maya and I knew that I wanted to use UPA style animation. For some reason, I am attracted to the simplicity of the flat cartoon look. This may be because often it repeats its patterns and geometry and I feel comfortable working like this. Whilst this may appear simplistic I still needed to work out how I could achieve this style in 3D software. I was concerned about creating transparent, 2D planes for all of the assets of my character, shapes and sets but was particularly worried about creating my Mountain King Model in 2D planes. This is because I have never rigged a 2D model before. I found this very challenging and I realise that just the thought of it made me feel quite anxious. However some of this was made easier because I worked out how long it might take me and the steps I needed to take. This made me realise that I prefer to work in a modular way, ie: collecting a set of tasks and being able to cross them off my list.
The king needed a front model, a left side model, a right side model and a back view too. I wasn't able to completely finish all the sides and at times struggled to create one side view. However, I feel a tremendous sense of achievement in completing the model and rigg that I have presented.
Personal Reflection
This project has enabled me to really understand my learning style. I know that I am task orientated and very literal and need instructions to be set out in a clear, logical and often pictorial way. Feedback from tutors has reinforced the fact that I will often think in isolation rather than as a continuum. I like a list and I like to cross things off my list and this is often more important to me than completing the whole tutorial, for example. In reality, what this actually means is that I don't always absorb information and take it with me into the next step - I almost have to relearn it, which can feel exhausting! Although I can often be frustrated by my inability to grasp things easily, I do persevere and was determined to see this project through to the end at whatever cost.
Throughout the project, I tried to imagine myself in the workplace and consequently tried to trying to work and think as a professional rather than student. This was a challenge for me but I really tried to make decisions about my work rather than seek constant reassurance that I was on the right track or get someone else to tell me what I ought to do next.
This project has allowed me and helped me to grow in confidence. I do feel a tremendous Sense of pride when I look at the work I have accomplished. When I started this course, I honestly would never have believed I would still be here in year 3! My journey has been long and hard. The complexities of my dyslexia which affects the way I see life has often made this journey painful but I am so proud of my Mountain King, so far!I am more able to accept feedback and criticism and see it now as a positive intervention rather than a negative one. This project seems also to have bonded the group as the strengths of all its different members have become identified. All of the group are willing to help and assist each other and I have enjoyed this sense of togetherness. I have been pleased that others have turned to me when they need to know what to hand in, or when they need to properly understand the task objectives for themselves. This has made me feel like a valued and respected member of the group and this is important to me.
Thursday, 10 January 2019
The Call: Minor Project - Submission 11/01/19
Wednesday, 9 January 2019
Tuesday, 8 January 2019
Monday, 7 January 2019
Rendering Scenes from my Previs
As I have mainly image planes for most my scenes, using Maya Software to render will be more useful to me. Rendering with Maya Software will help with my scenes because everything in my world is flat. I also don't need any shadows because I'm not trying to create "real life."
Here's an example below. Even Moom (my placeholder character) looks flat and 2D:
Here's an example below. Even Moom (my placeholder character) looks flat and 2D:
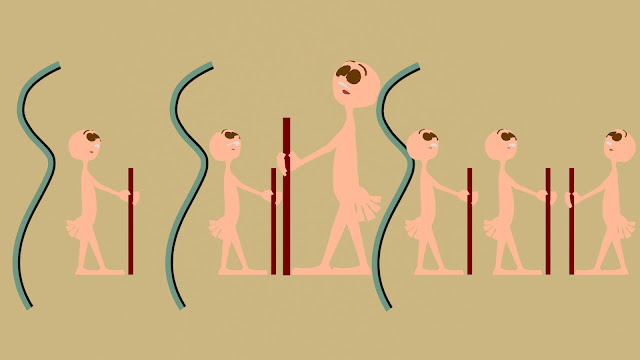 |
| 'S' Shape Scene |
Saturday, 5 January 2019
@Alan Rendering Tiff, Diffuse Planes
Friday, 4 January 2019
Previs and Art of Progression
This is my unfinished Art of. I need to add my writings and some additional images. I also attach my Previs. This tells my story using Moom instead of the Mountain King.
The Call - Previs from Jennifer Ball on Vimeo.
Part 10: Squash & Stretch (Left Side View)
Part 9: Body Rigging (Left Side View)
Subscribe to:
Comments (Atom)


